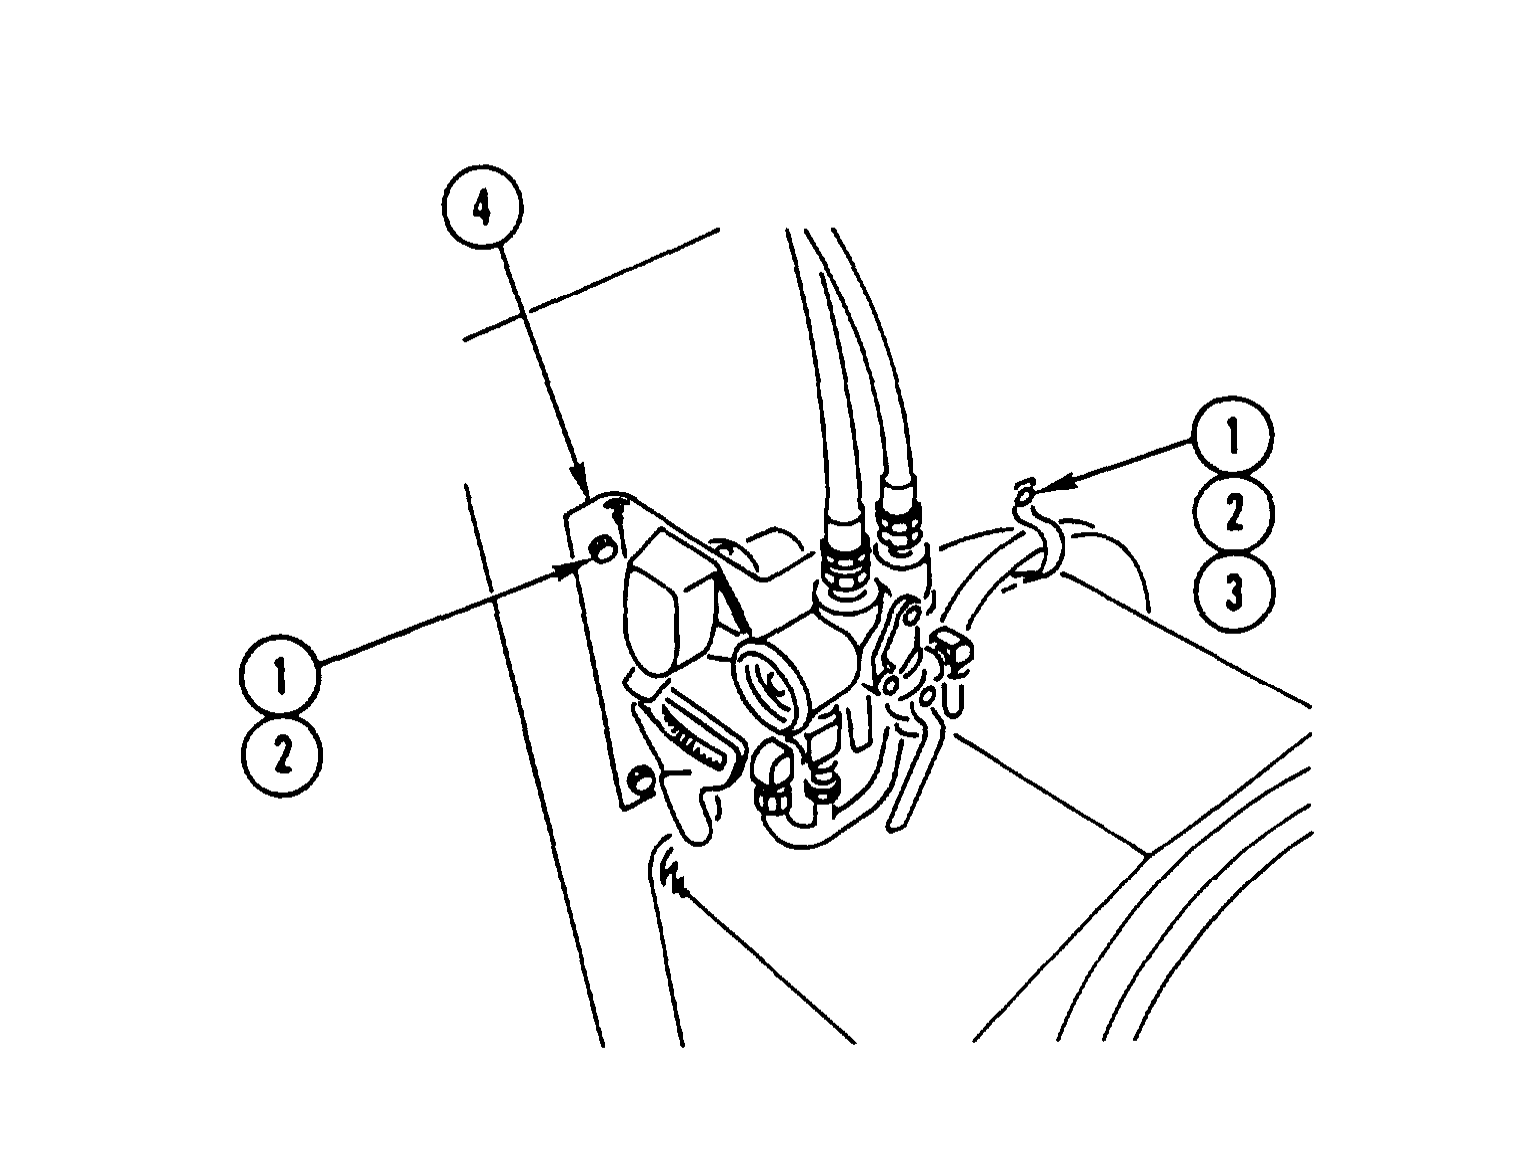
Hydraulic Pump Replacement
TM 9-2320-363-34-1 · Chapter 11 — Winch Maintenance
This task covers: a. Removal b. Cleaning c. Inspection d. Repair e. Installation
Applicable Configuration:                              General Safety Instructions:

M916A1 and M916A2
                                                                          WARNING
Tools and Special Equipment:
                                                              l    Adhesives, s o l v e n t s , a n d
Shop Equipment, SC 4910-95-CL-A31                                 sealing compounds can burn
Tool Kit, SC 5180-90-CL-N05                                       easily, can give off harmful
                                                                  vapors, and are harmful to
Materials/Parts:                                                  skin and clothing. To avoid
                            P/N 58864 9961                        injury or death, keep away
Packing (4)
                                                                  from open fire and use in
Nut, Lock (2)                                                     well-ventilated      area.        If
                                                                  adhesive, solvent, or sealing
Washer, Lock (4)
                                                                  compound gets on skin or
Washer, Lock (16)           P/N 1123                              clothing, wash immediately
                                                                  with soap and water.
Compound, Pipe              Appendix B, Item 15
Sealing                                                       l   Hydraulic pump is heavy. Use
                                                                  extreme     caution during
Personnel Required: (2)                                           removal to prevent possible
                                                                  injury to personnel or
References:
                                                                  damage to equipment.
TM 9-2320-363-20

Equipment Condition:

Reference                   Condition Description
TM 9-2320-363-20            Winch Hydraulic Oil Tank
                            Drained
TM 9-2320-363-20            Transmission Tunnel
                            Access Cover Removed
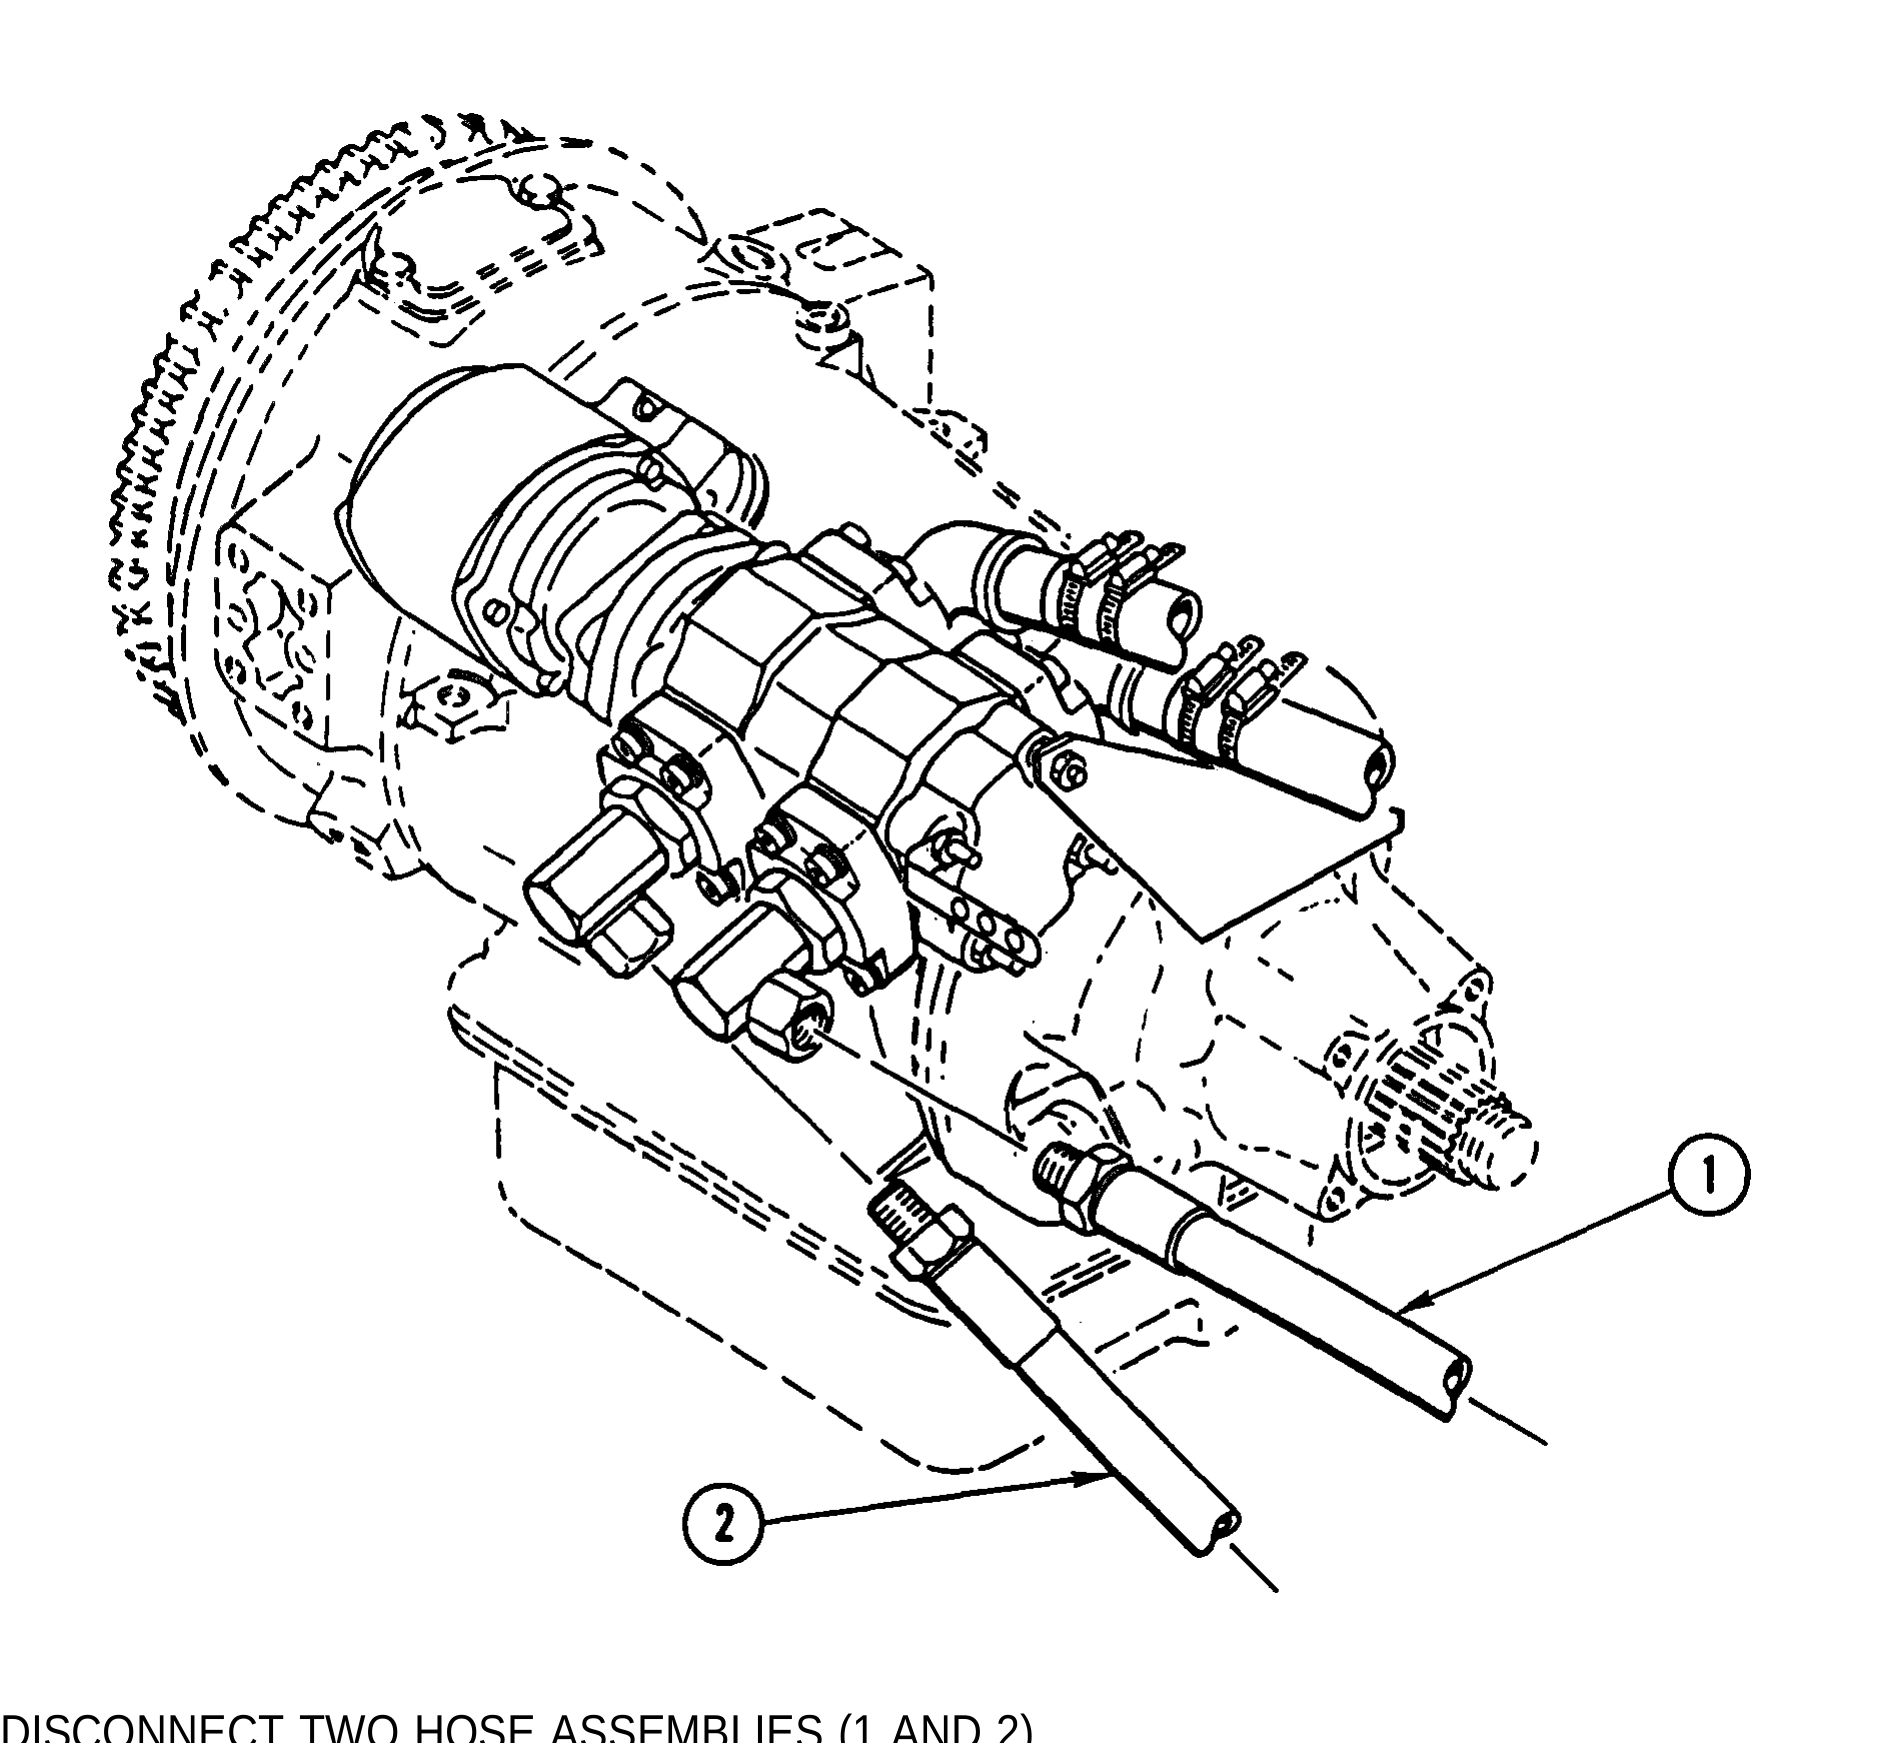
1. DISCONNECT TWO HOSE ASSEMBLIES (1 AND 2).
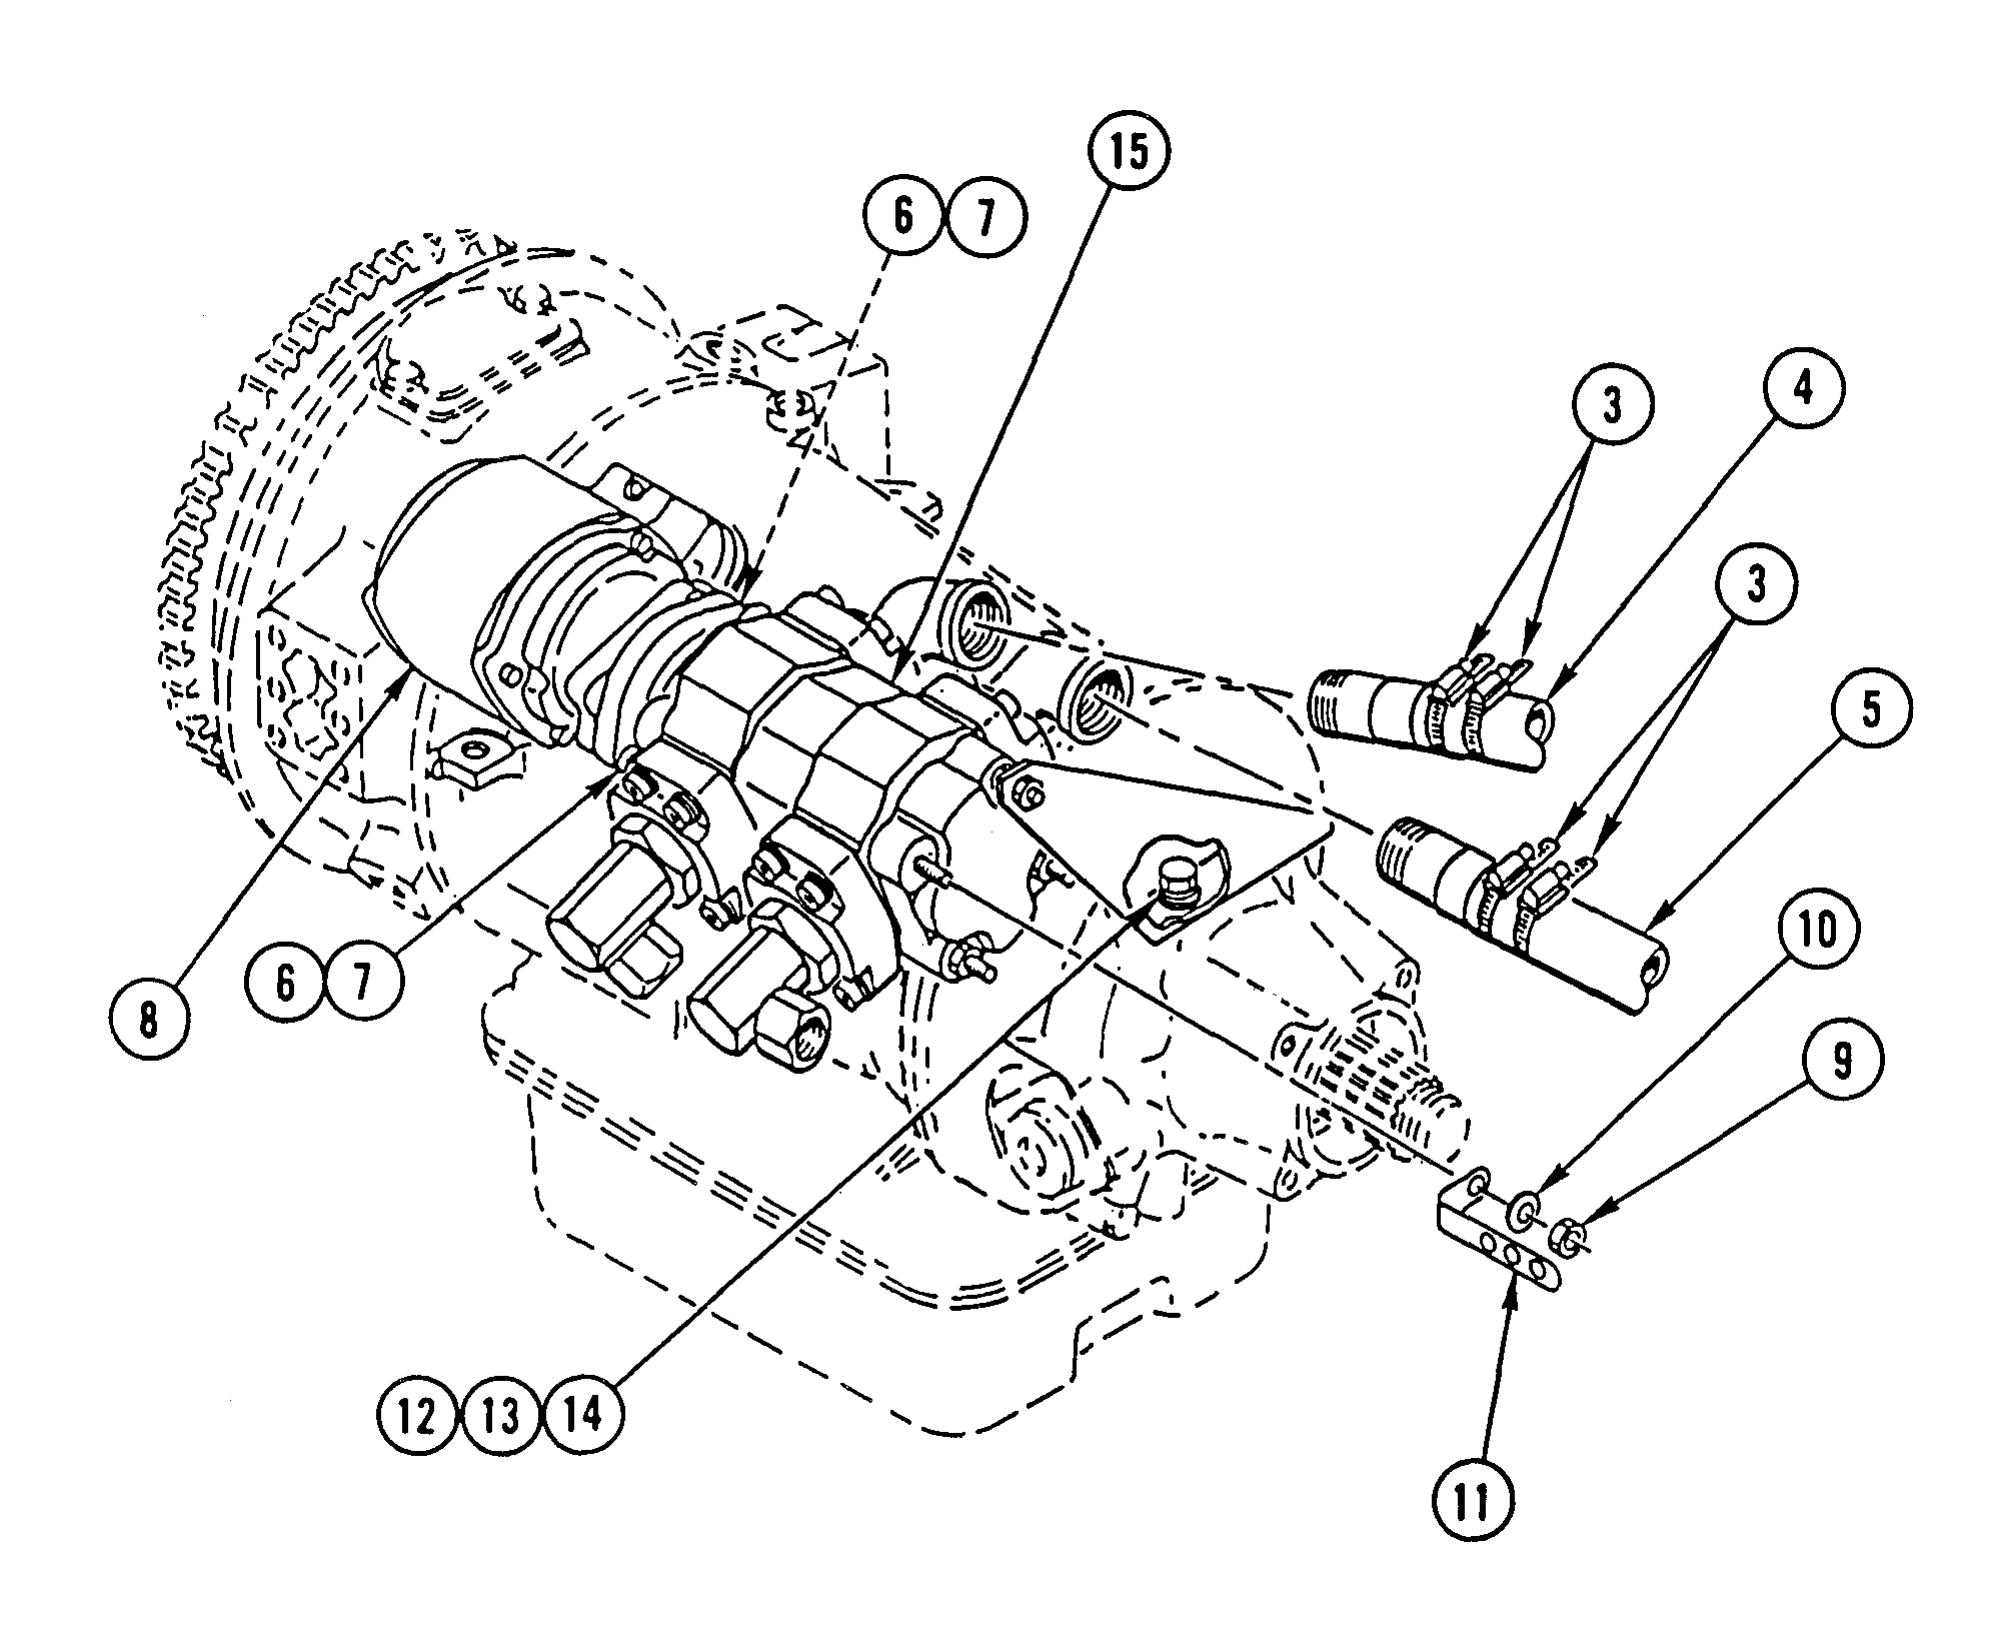
2. LOOSEN FOUR CLAMPS (3) AND DISCONNECT TWO HOSE AND ADAPTER ASSEMBLIES (4 AND 5).
3. REMOVE TWO BOLTS (6) AND TWO LOCK WASHERS (7) FROM PTO (8). DISCARD LOCK WASHERS.
4. REMOVE LOCK NUT (9), WASHER (10), AND BRACKET(11). DISCARD LOCK NUT.
5. REMOVE TWO BOLTS (12), TWO WASHERS (13), TWO LOCK WASHERS (14), AND HYDRAULIC PUMP (15). DISCARD LOCK WASHERS.
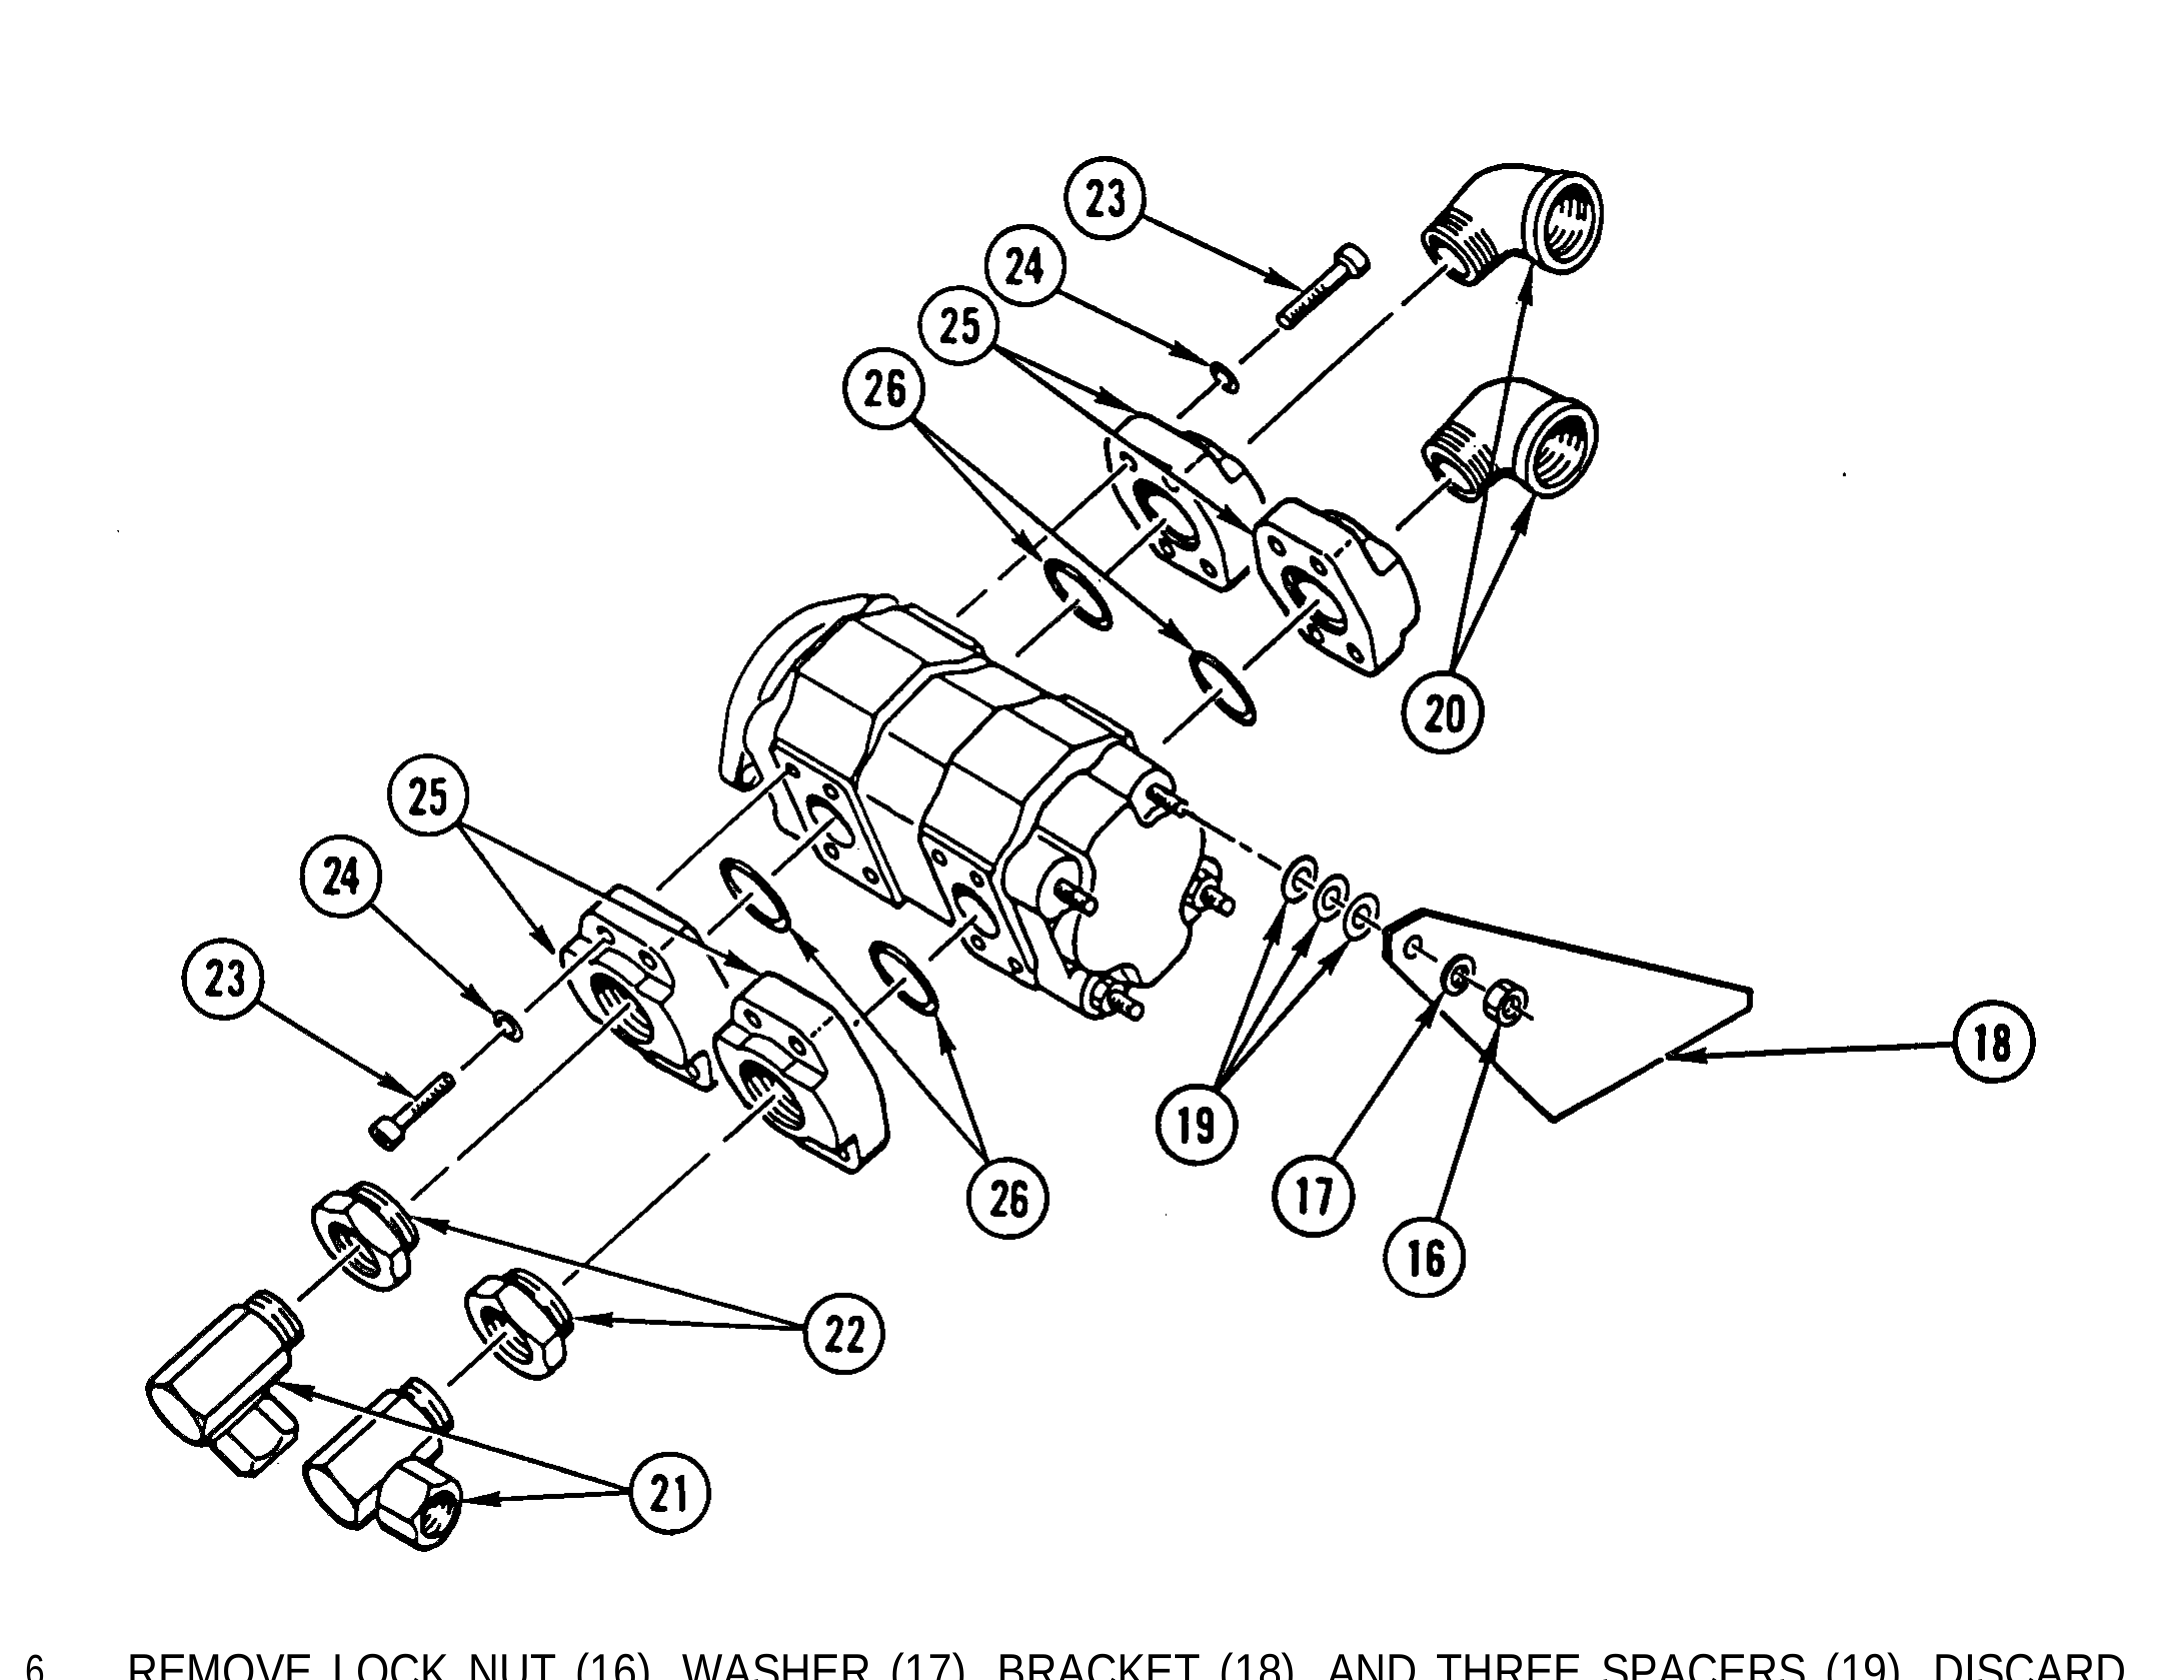
6. REMOVE LOCK NUT (16), WASHER (17), BRACKET (18), AND THREE SPACERS (19). DISCARD LOCK NUT.
7. REMOVE TWO ELBOWS (20).
8. REMOVE TWO ELBOWS (21) AND TWO ADAPTERS (22).
9. REMOVE 16 SOCKET HEAD SCREWS (23), 16 LOCK WASHERS (24), 4 ADAPTERS (25), AND 4 PACKINGS (26). DISCARD PACKINGS AND LOCK WASHERS.
Use general cleaning methods to clean all parts (page 2-30).
Inspect all parts for wear or damage.
Use general repair methods to repair damaged parts (page 2-33).
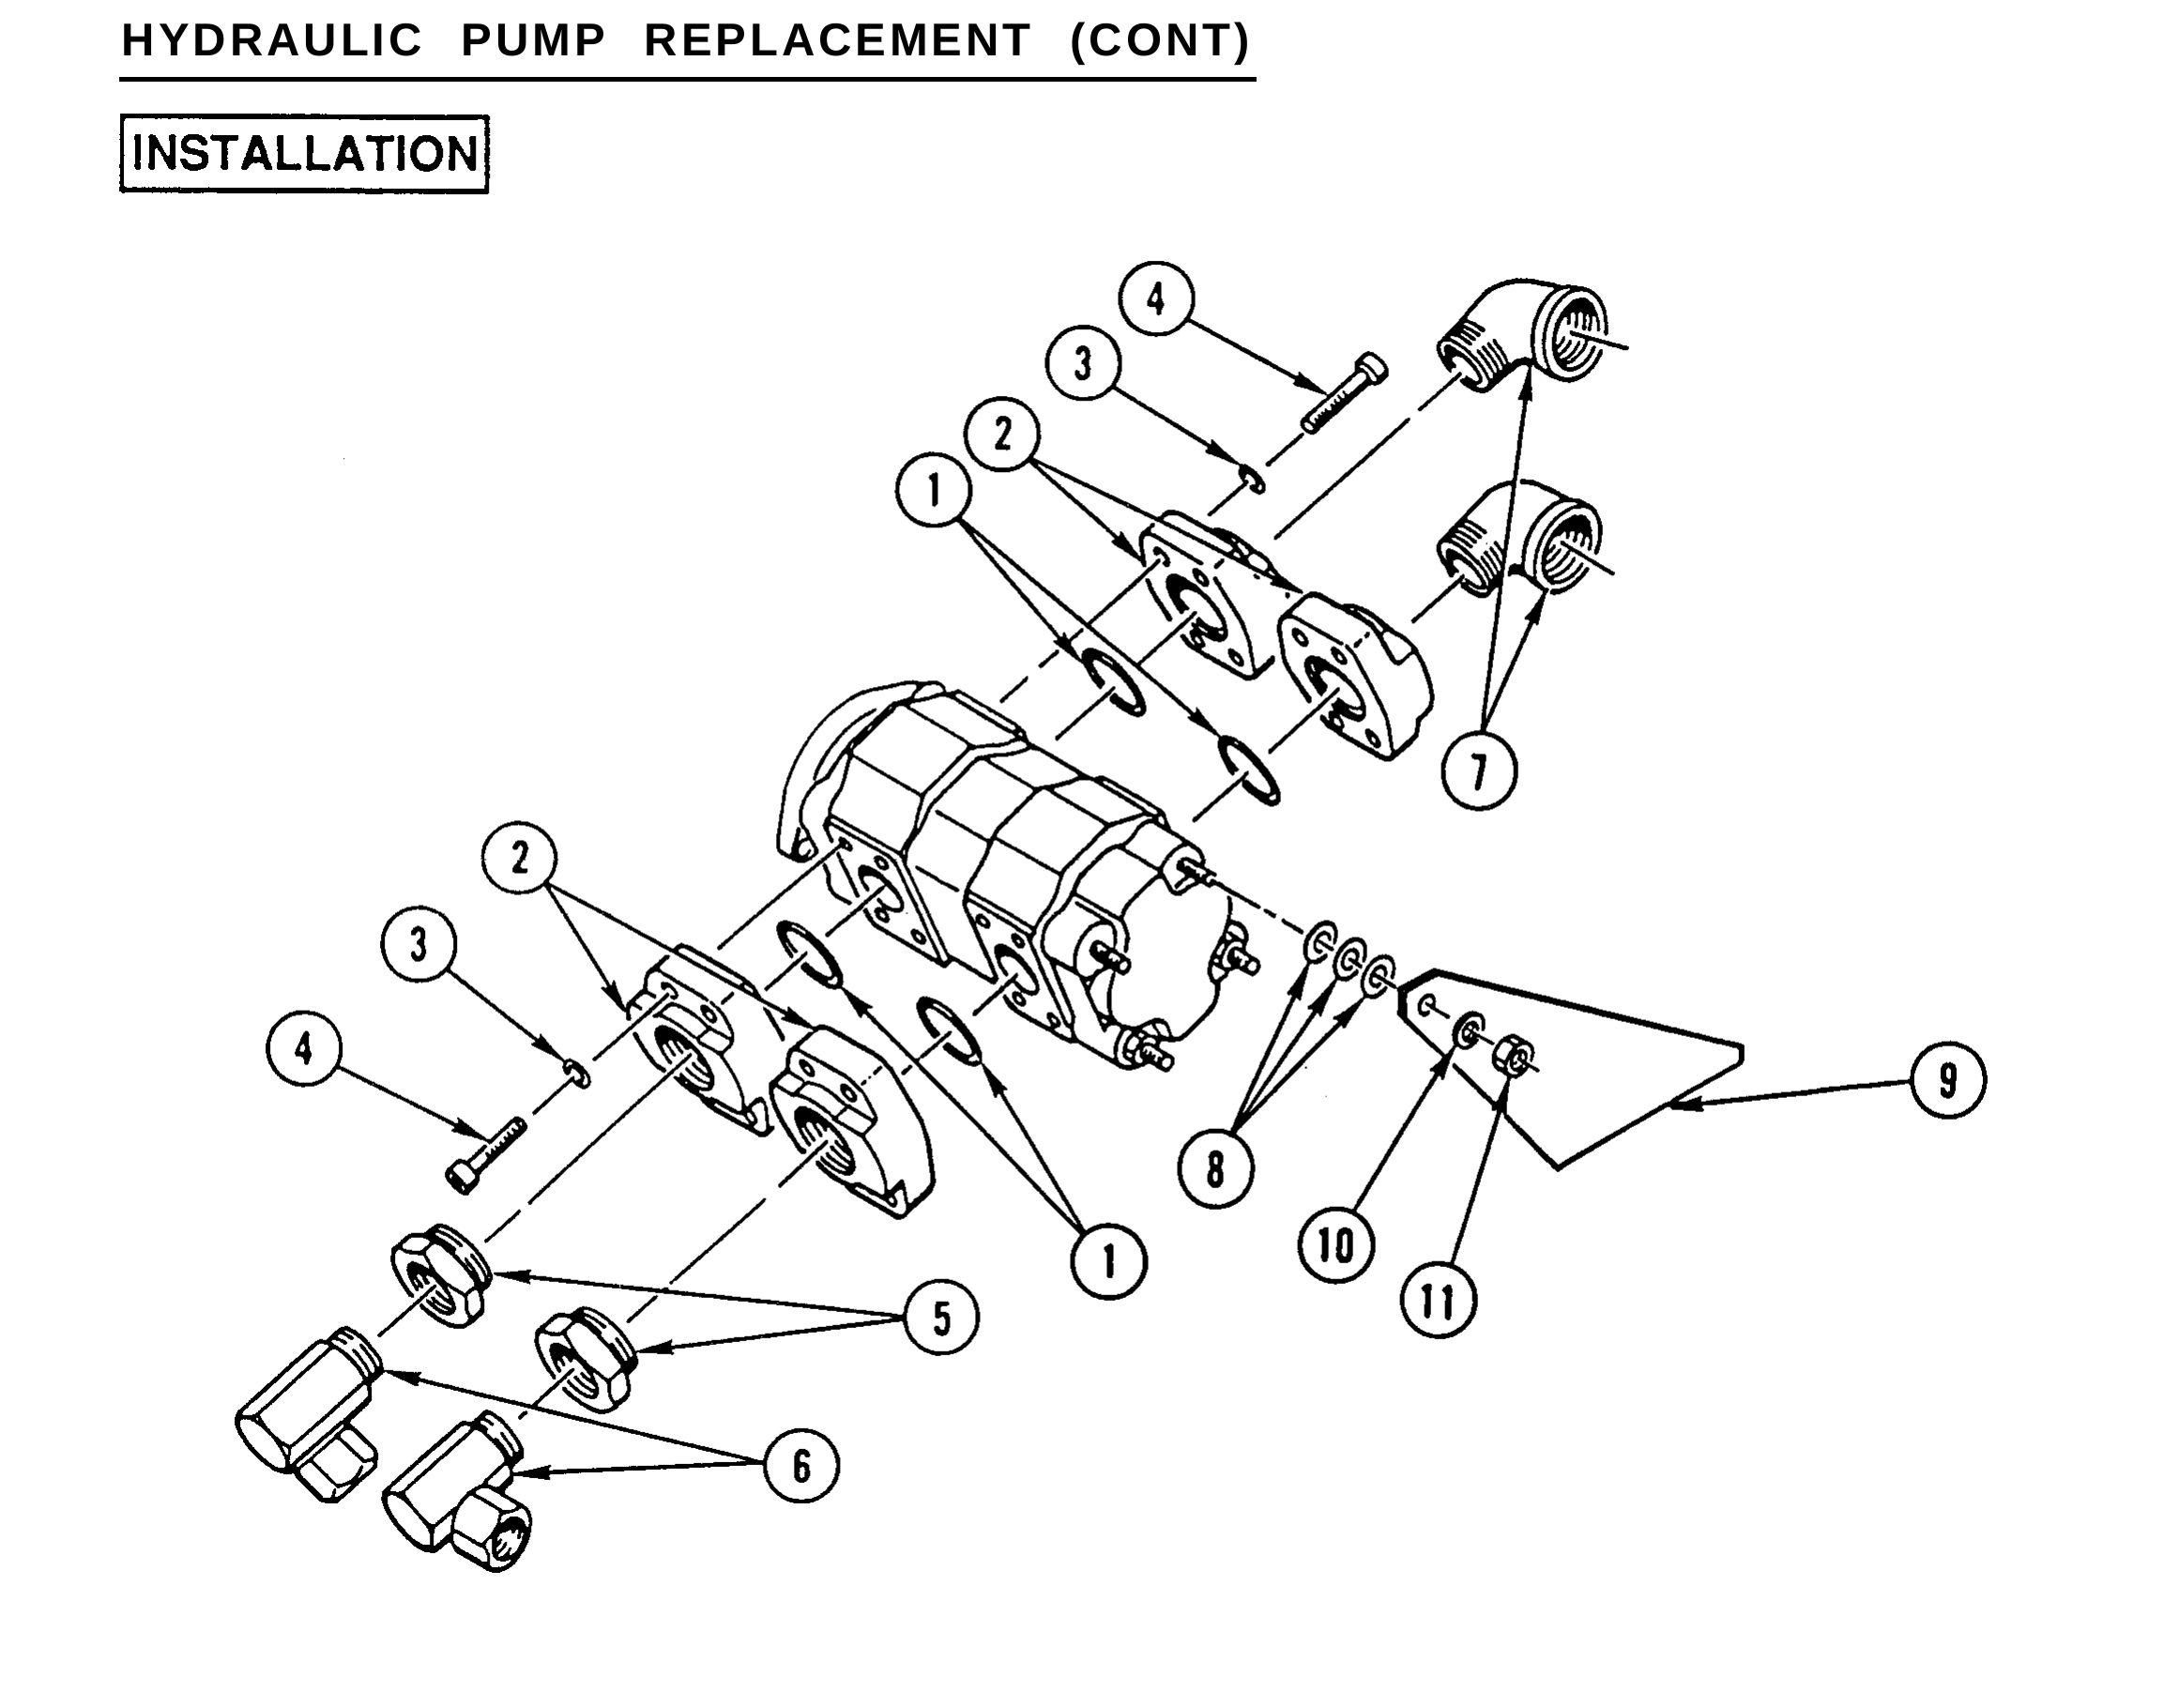
1. INSTALL 4 NEW PACKINGS (1), 4 ADAPTERS (2), 16 NEW LOCK WASHERS (3), AND 16 SOCKET HEAD SCREWS (4).
2. INSTALL TWO ADAPTERS (5) AND TWO ELBOWS (6).
3. COAT THREADS OF TWO ELBOWS (7) AND TWO ADAPTERS (8) WITH PIPE SEALING COMPOUND.
4. INSTALL TWO ELBOWS (7).
5. INSTALL THREE SPACERS (8), BRACKET (9), WASHER (10), AND NEW LOCK NUT (11).
6. INSTALL HYDRAULIC PUMP (12), TWO NEW LOCK WASHERS (13), TWO WASHERS (14), AND TWO BOLTS (15).
7. INSTALL BRACKET (16), WASHER (17), AND NEW LOCK NUT (18).
8. INSTALL TWO NEW LOCK WASHERS (19) AND TWO BOLTS (20) IN PTO (21).
9. CONNECT TWO HOSE AND ADAPTER ASSEMBLIES (22 AND 23) AND TIGHTEN FOUR CLAMPS (24).
10. CONNECT TWO HOSE ASSEMBLIES (25 AND 26).
Fill winch hydraulic oil tank (TM 9-2320-363-20). Install transmission tunnel access cover (TM 9-2320-363-20).