Front Ball, Bushing, and Oil Seal Replacement
TM 9-2320-363-34-1 · Chapter 5 — Front Axle Maintenance
This task covers: a. Removal b. Cleaning c. Inspection d. Installation
Applicable Configuration:                           General Safety Instructions:

All except M915A2
                                                                      WARNING
Tools and Special Equipment:
                                                           l    Ball and bushing assembly is
Shop Equipment, SC 4910-95-CL-A31                              heavy and can injure
Tool Kit, SC 5180-90-CL-N05                                    personnel if dropped. Support
                                                               ball and bushing assembly
Materials/Parts:                                               during removal or installation.
Seal, Oil                   P/N 53R012                     l      Adhesives, solvents, and
Adhesive-Sealant,           Appendix B, Item 3                 sealant compounds can burn
Silicone                                                       easily, can give off harmful
                                                               vapors, and are harmful to
Personnel Required: (2)                                        skin and clothing. To avoid
                                                               injury or death, keep away
Equipment Condition:                                           from open fire and use in
                                                               well-ventilated     area. If
Reference                   Condition Description              adhesive, solvent, or sealant
Page 5-15                   Front Ball Socket                  compound gets on skin or
                            Removed                            clothing, wash immediately
                                                               with soap and water.
1. REMOVE FOUR NUTS (1) AND FOUR WASHERS (2) FROM BOTTOM HOLES OF BALL AND BUSHING ASSEMBLY (3).
2. REMOVE SIX BOLTS (4) AND SIX WASHERS (5) AND REMOVE BALL AND BUSHING ASSEMBLY (3) FROM AXLE HOUSING ASSEMBLY (6).
3. REMOVE OLD SEALANT FROM MOUNTING FACE OF AXLE HOUSiNG ASSEMBLY (6) AND BALL AND BUSHING ASSEMBLY (3).
4. PRY OIL SEAL (7) FROM BALL AND BUSHING ASSEMBLY (3). DISCARD OIL SEAL.
5. MEASURE OUTER DIAMETER OF FRONT AXLE SHAFT AND INNER DIAMETER OF AXLE BALL BUSHING (8). IF DIFFERENCE IS LESS THAN 0.008 IN. (0.203 mm) OR MORE THAN 0.020 IN. (0.508 mm), REMOVE BUSHING (8) FROM AXLE BALL (9).
6. IF DAMAGED, REMOVE FOUR STUDS (10).
Use general cleaning methods to clean all parts (page 2-30).
Inspect all parts for wear or damage.
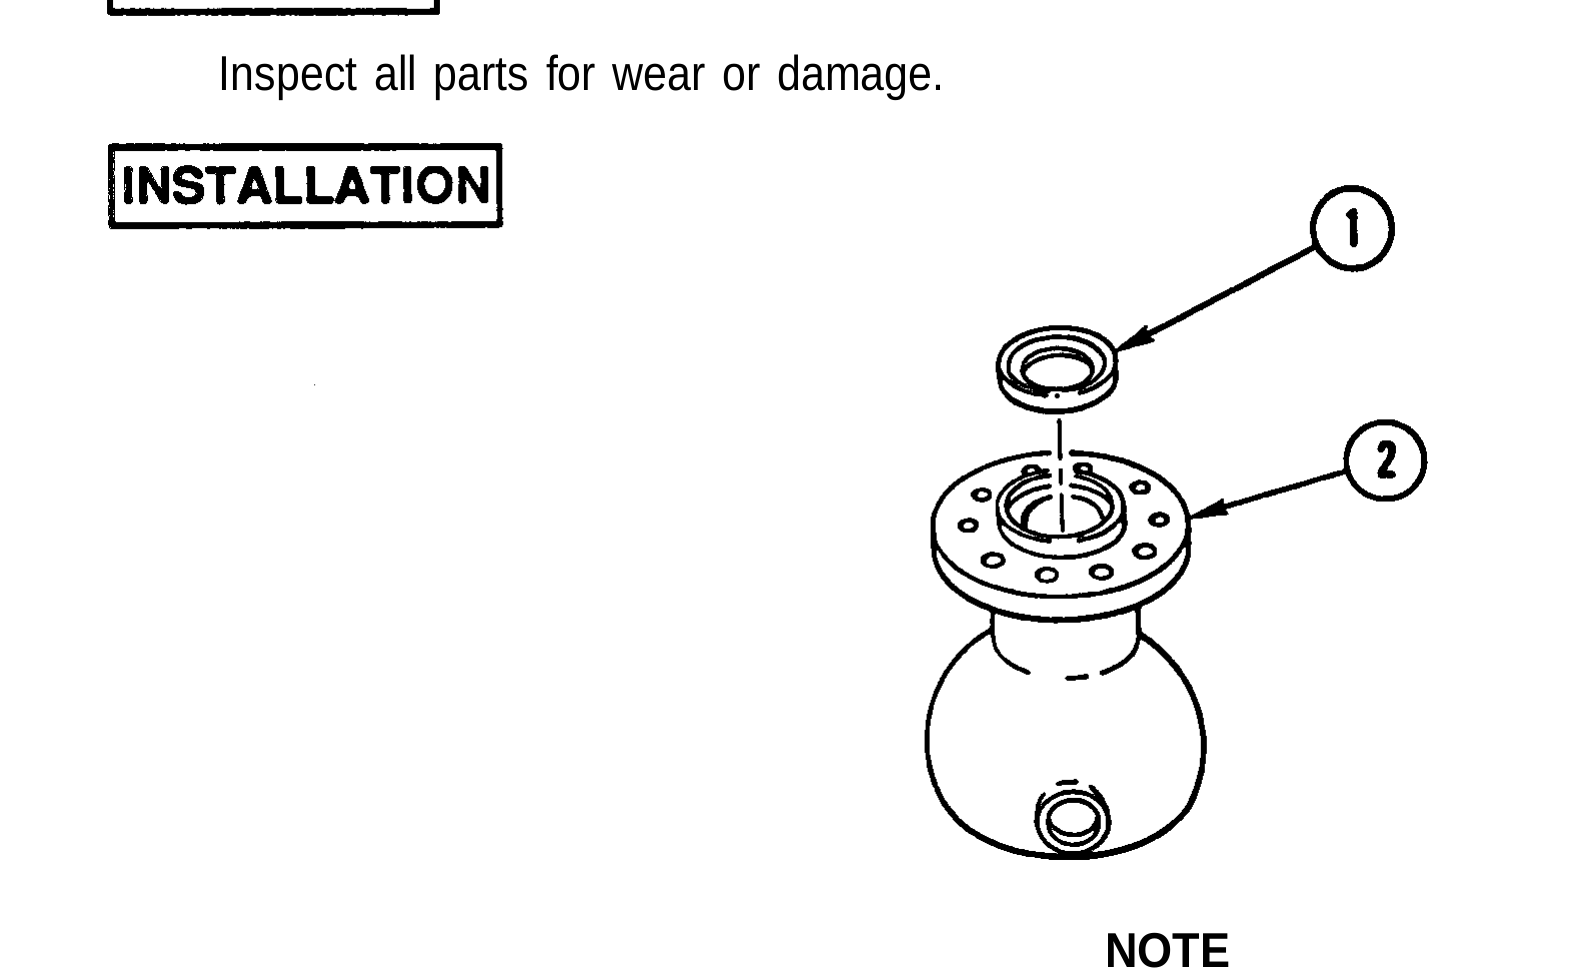
1. INSTALL NEW OIL SEAL (1) IN AXLE BALL (2).
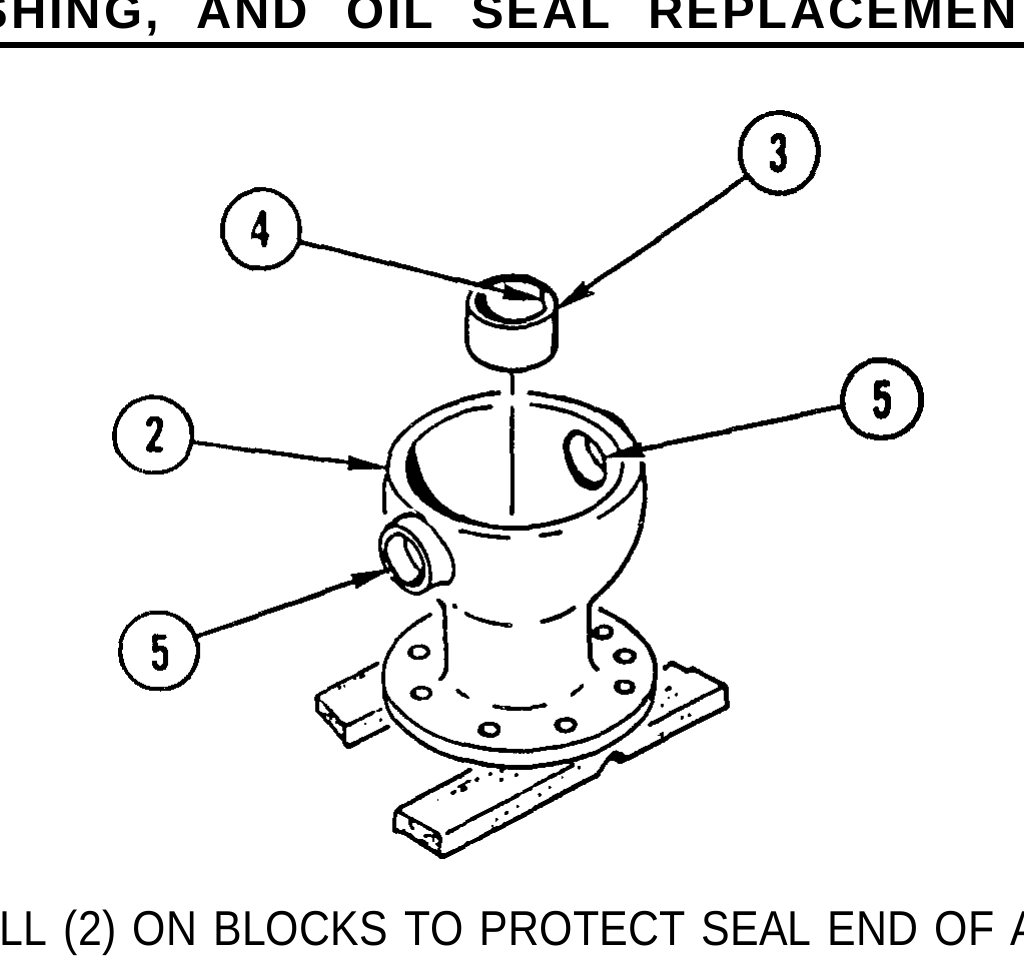
2. SUPPORT AXLE BALL (2) ON BLOCKS TO PROTECT SEAL END OF ASSEMBLY.
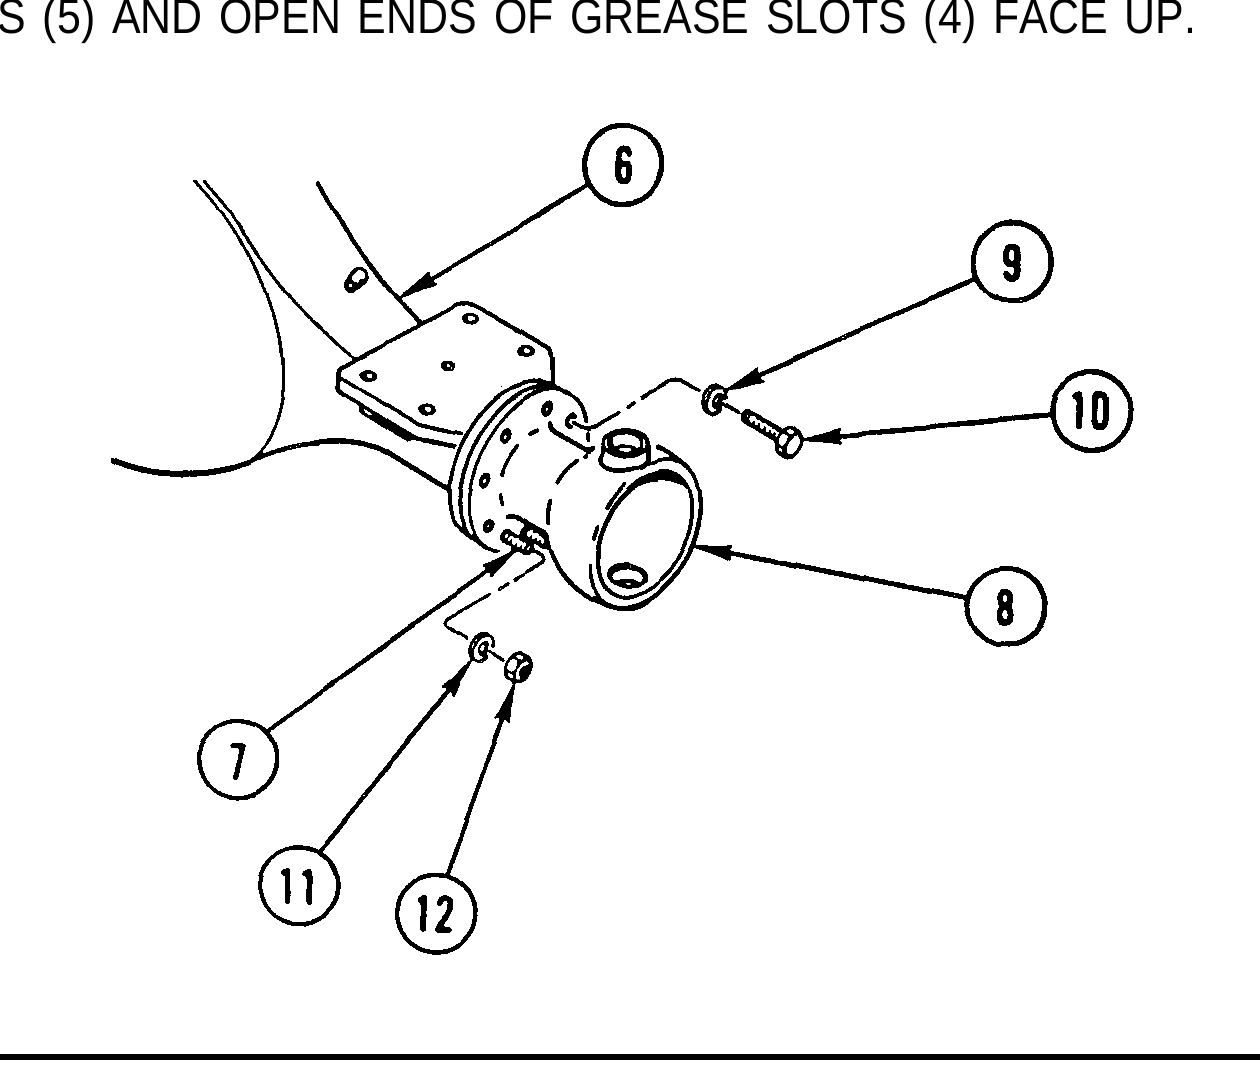
3. INSTALL AXLE BALL BUSHING (3) IN AXLE BALL (2) SO GREASE SLOTS (4) ARE ALlNED WITH TRUNNION HOLES (5) AND OPEN ENDS OF GREASE SLOTS (4) FACE UP.
4. COAT MOUNTING FACE OF AXLE HOUSING ASSEMBLY (6) WITH SILICONE ADHESIVE-SEALANT.
5. IF REMOVED, INSTALL FOUR NEW STUDS (7) ON AXLE HOUSING ASSEMBLY (6).
Ball and bushing assembly is heavy and can injure personnel if dropped. Support ball and bushing assembly during installation.
6. INSTALL BALL AND BUSHING ASSEMBLY (8), SIX WASHERS (9), AND SIX BOLTS (10) ON AXLE HOUSING ASSEMBLY (6).
7. INSTALL FOUR WASHERS (11) AND FOUR NUTS (12) ON FOUR STUDS (7).
Install front ball socket (page 5-15).