Air Shift Chamber Replacement
TM 9-2320-363-34-1 · Chapter 3 — Power Package Maintenance
This task covers: a. Removal b. Cleaning c. Inspection d. Installation
 INITIAL SETUP

Applicable Configuration:                           Equipment Condition:
All except M915A2                                   Reference                Condition Description
Tools and Special Equipment:                        TM 9-2320-363-20         Air System Drained
Tool Kit, SC 5180-90-CL-N05                         TM 9-2320-363-20         Transfer Case Oil
                                                                             Drained
Materials/Parts:
                                                    General Safety Instructions:
Seal                        P/N 234322
Packing                     P/N 1PS43
                                                                     WARNING
Nut, Lock                                                  Adhesives, solvents, and
                                                           sealing compounds can burn
Gasket                      P/N 13308 FX
                                                           easily, can give off harmful
Washer, Lock (2)                                           vapors, and are harmful to skin
                                                           and clothing. To avoid injury or
Adhesive-Sealant,       Appendix B, Item 3                 death, keep away from open
Silicone
                                                           fire and use in well-ventilated
Compound, Pipe              Appendix B, Item 15            area. If adhesive, solvent, or
Sealing                                                    sealing compound gets on skin
                                                           or clothing, wash immediately
References:                                                with soap and water.

TM 9-2320-363-20
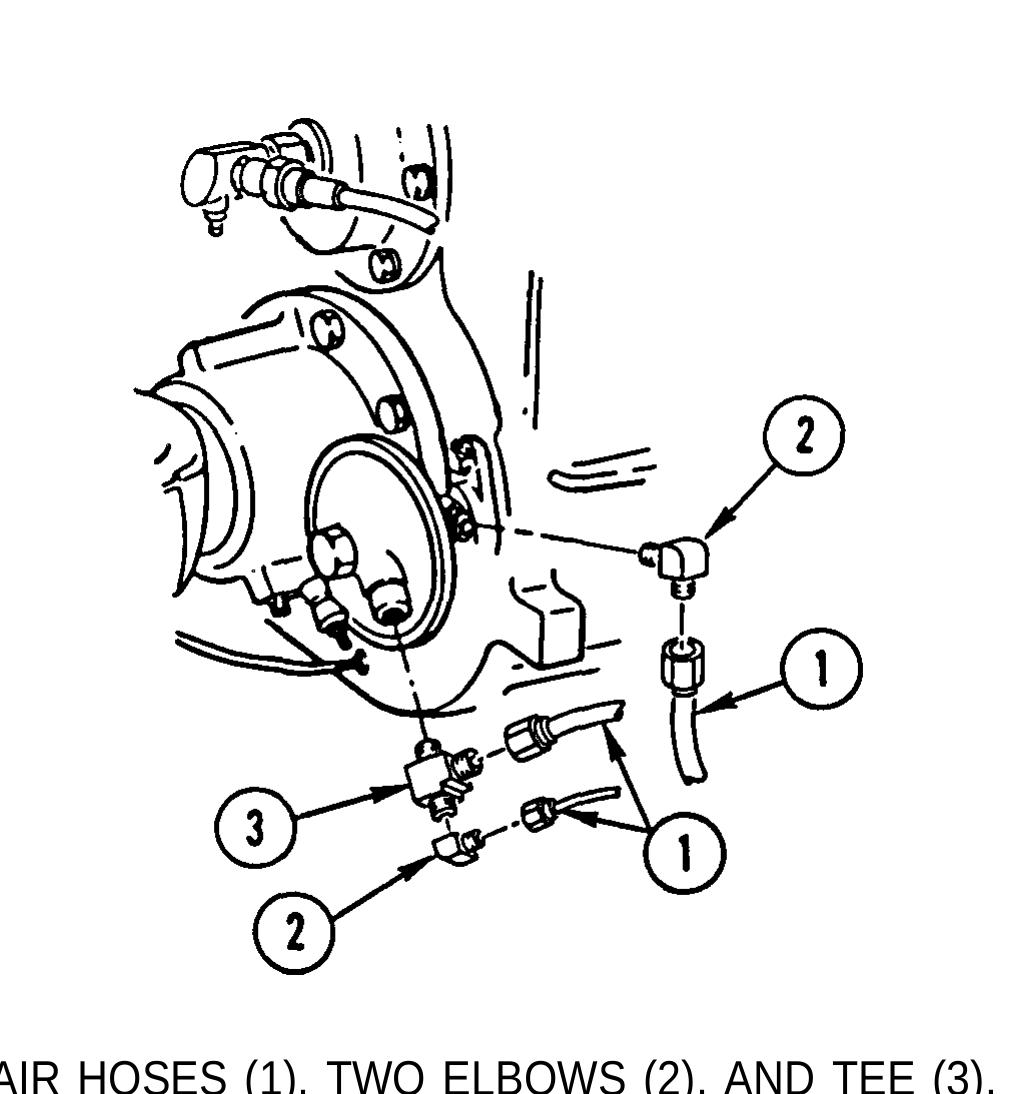
1. REMOVE THREE AIR HOSES (1), TWO ELBOWS (2), AND TEE (3).
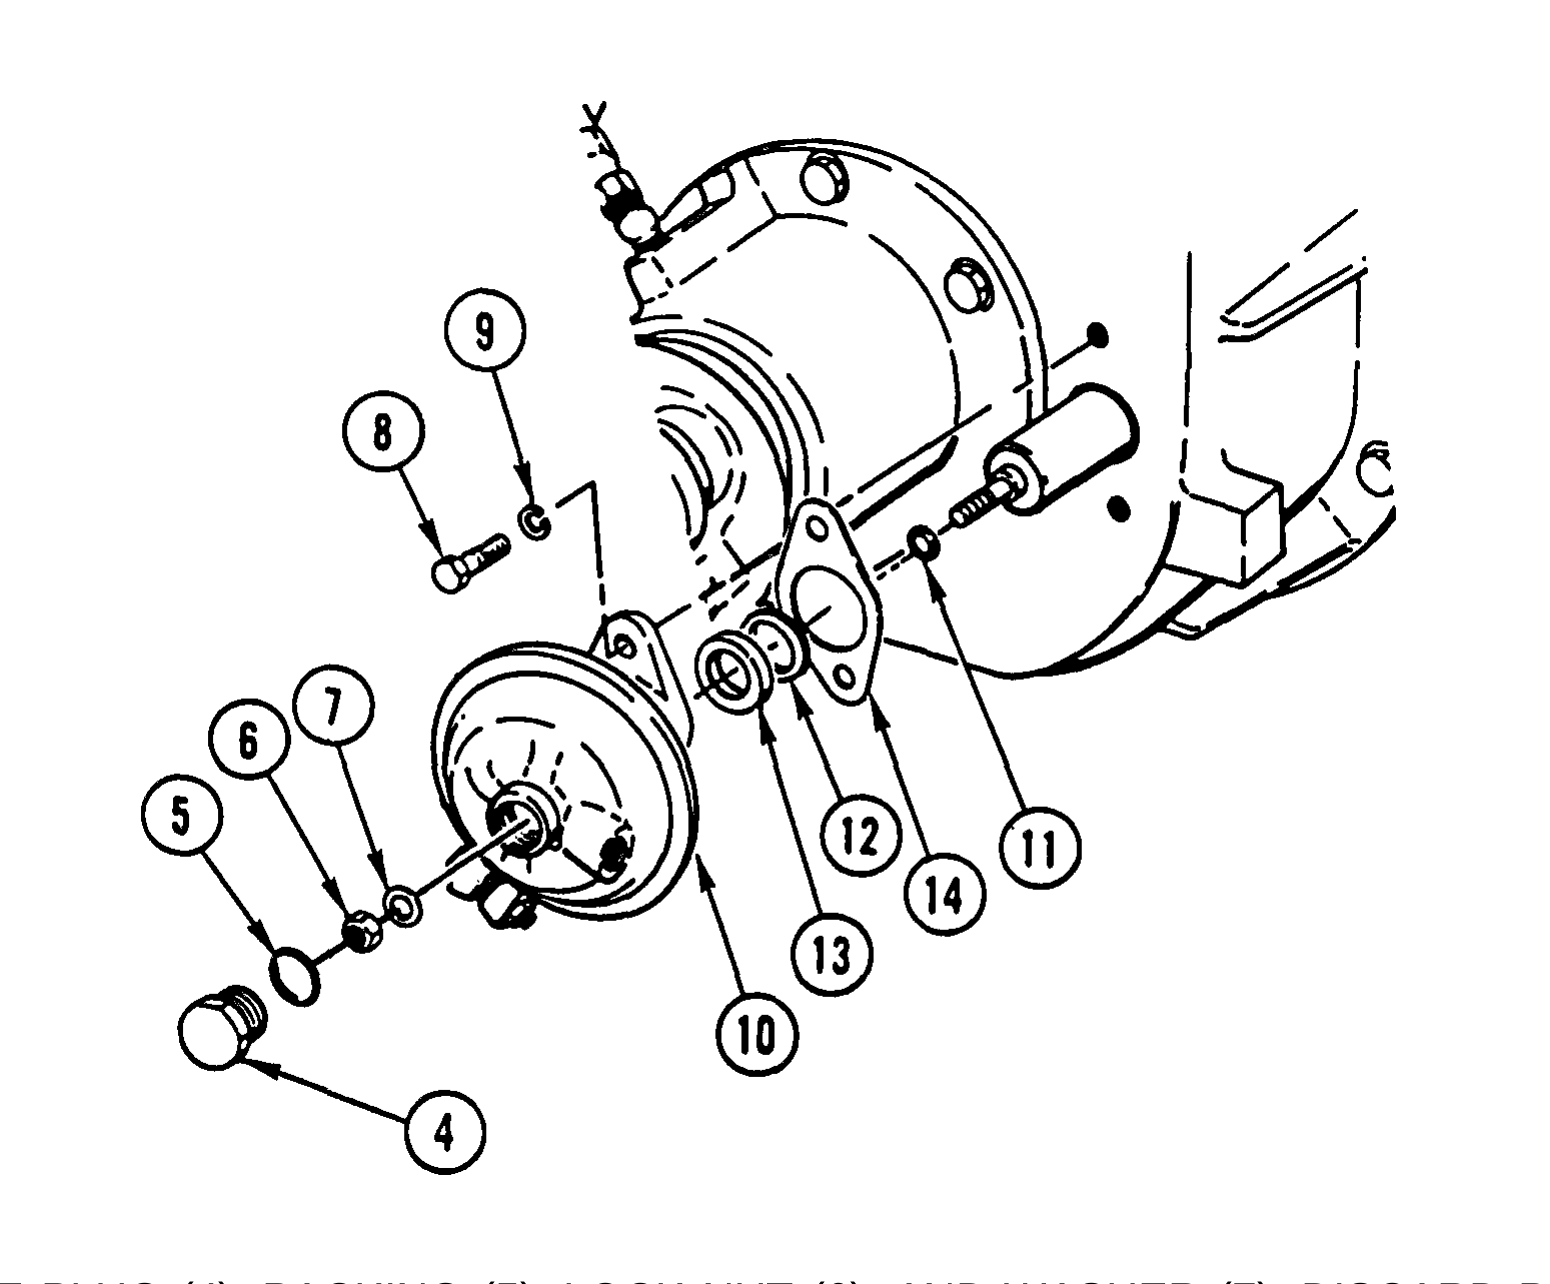
2. REMOVE PLUG (4), PACKING (5), LOCK NUT (6), AND WASHER (7), DISCARD PACKING AND LOCK NUT.
3. REMOVE TWO SCREWS (8), TWO LOCK WASHERS (9), AIR SHIFT CHAMBER (10), WASHER (11), PILOT RING (12), SEAL (13), AND GASKET (14). DISCARD LOCK WASHERS, SEAL, AND GASKET.
Use general cleaning methods to clean all parts (page 2-30).
Inspect all parts for wear or damage.
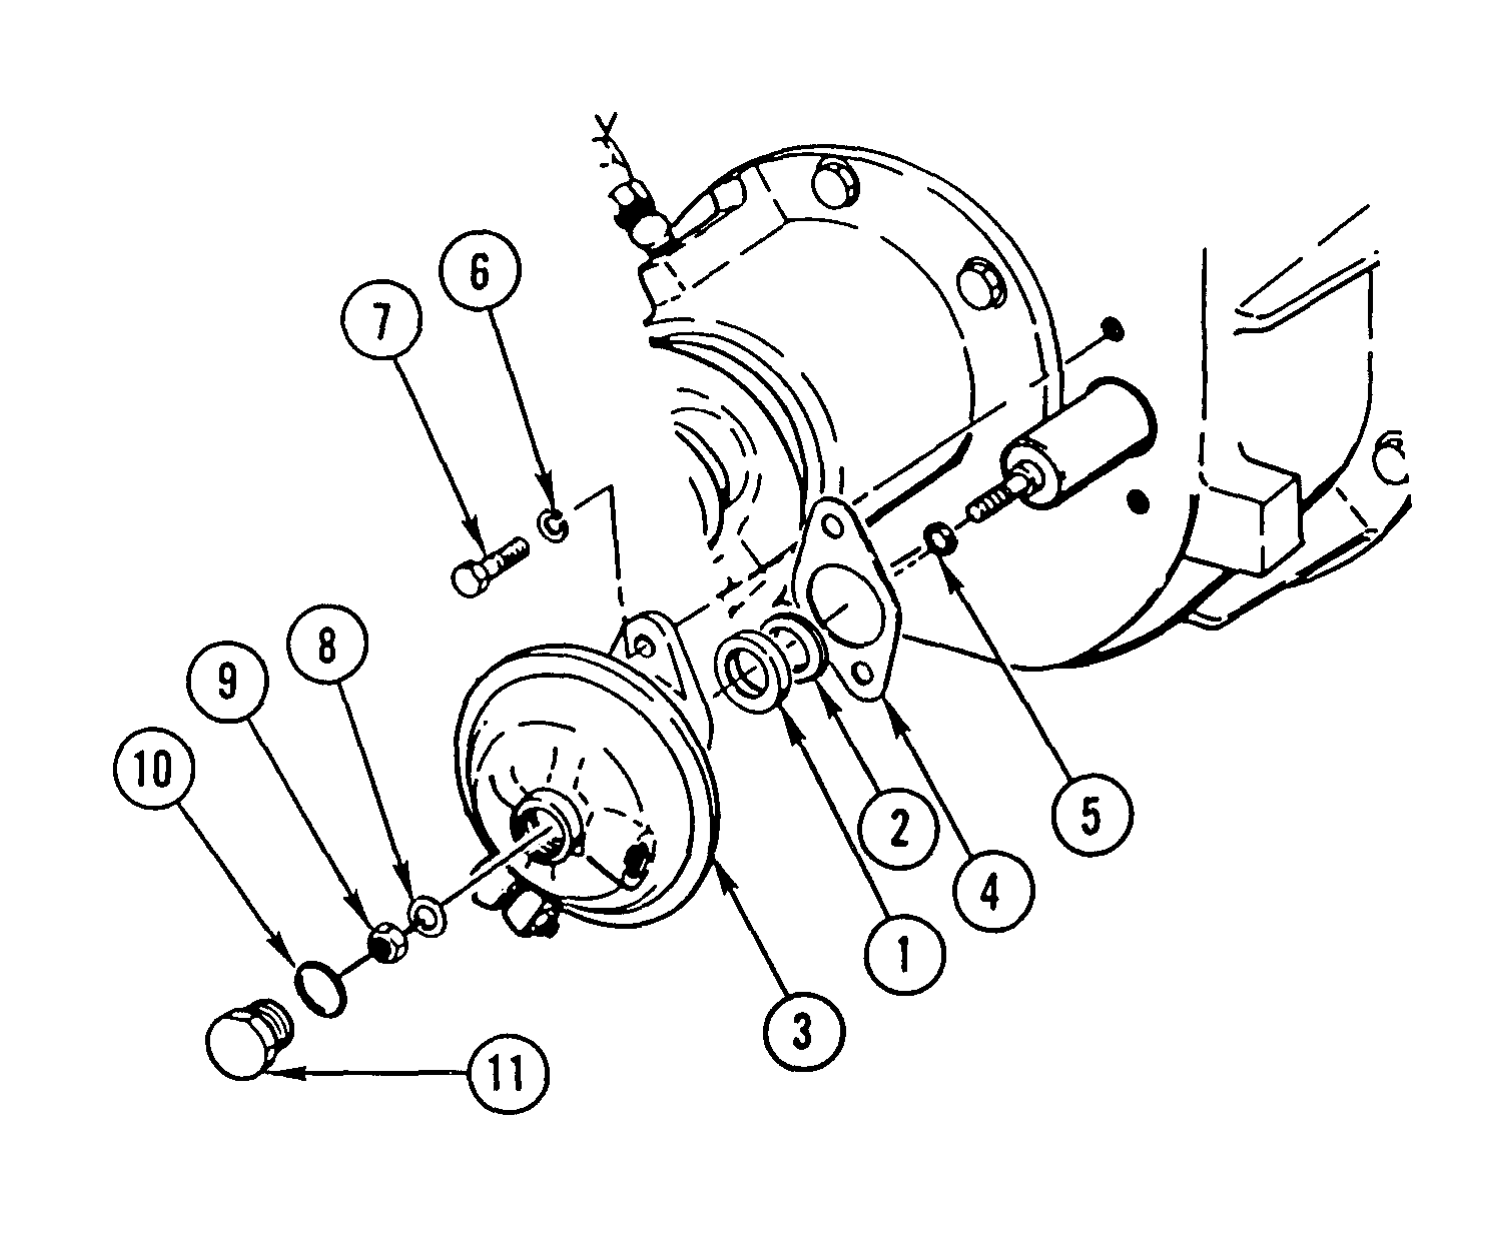
1. INSTALL NEW SEAL (1) AND PILOT RING (2) IN AIR SHIFT CHAMBER (3).
2. COAT BOTH SIDES OF NEW GASKET (4) WITH SILICONE ADHESIVE-SEALANT AND INSTALL ON AIR SHIFT CHAMBER (3).
3. INSTALL WASHER (5), AIR SHIFT CHAMBER (3), TWO NEW LOCK WASHERS (6), AND TWO SCREWS (7).
4. INSTALL WASHER (8), NEW LOCK NUT (9), NEW PACKING (10), AND PLUG (11).
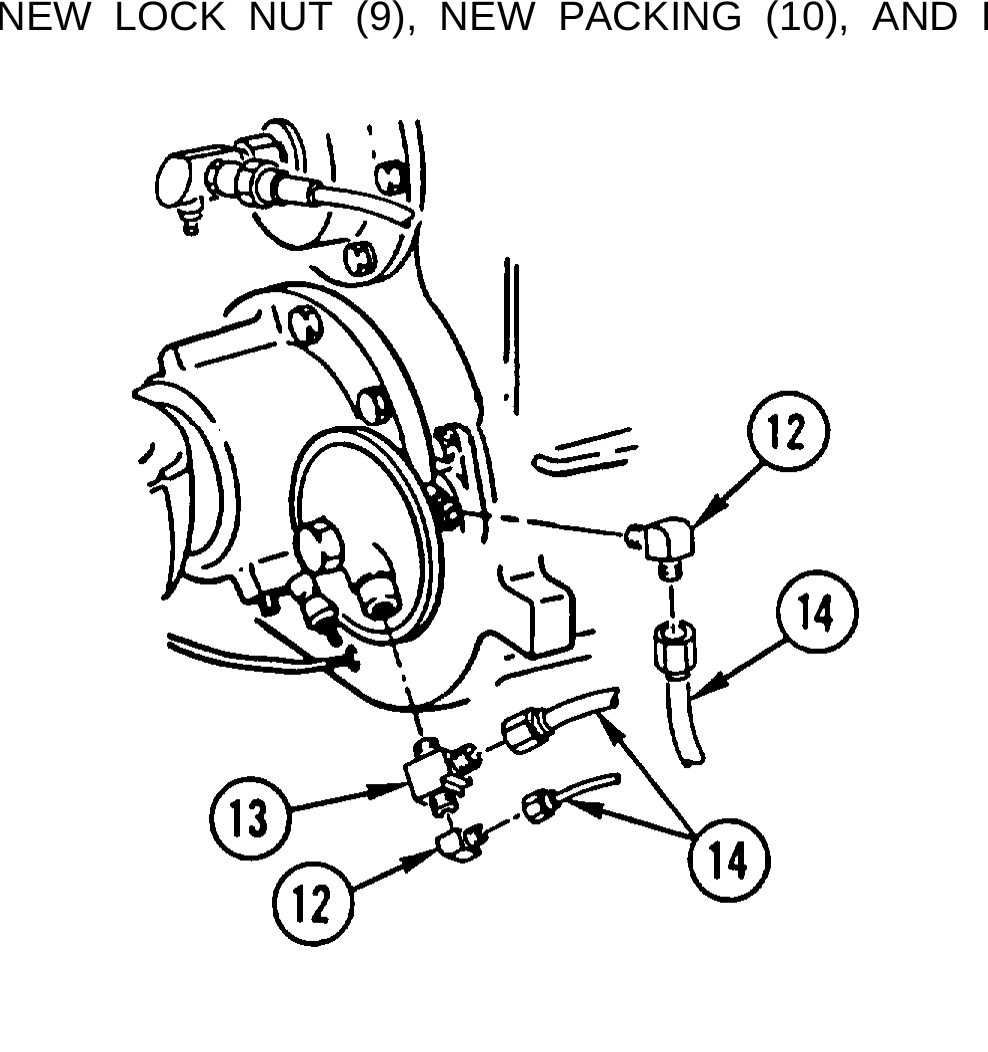
5. COAT THREADS OF TWO ELBOWS (12) AND TEE (13) WITH PIPE THREAD SEALING COMPOUND.
6. INSTALL TWO ELBOWS (12), TEE (13), AND THREE AIR HOSES (14).
Fill transfer case with oil (TM 9-2320-363-20).