2-37. Fuel Injection Nozzle Repair
TM 9-2815-237-34 · Chapter 2 — Engine Maintenance
This task covers:
a. Cleaning c. Testing
b. Inspection
INITIAL SETUP:
     Tools                                                General Safety Instructions
        General mechanic’s tool kit:                        ● Do not place hands or arms near nozzle during
         automotive (Appendix E, Item 1)                      testing.
                                                            ● Compressed air for cleaning purposes will not
     Test Equipment                                           exceed 30 psi (207 kPa).
        Nozzle tester (Appendix E, Item 31)                 ● Wear eyeshields when using compressed air.

     Manual References
        TM 9-2815-237-34P
     Equipment Condition
        Engine disassembled into subassemblies
        (para. 2-15).

     a. Cleaning

 Clean fuel injection nozzle (2) in accordance with para. 2-9.

                                                    NOTE
                            For general inspection instructions, refer to para. 2-10.
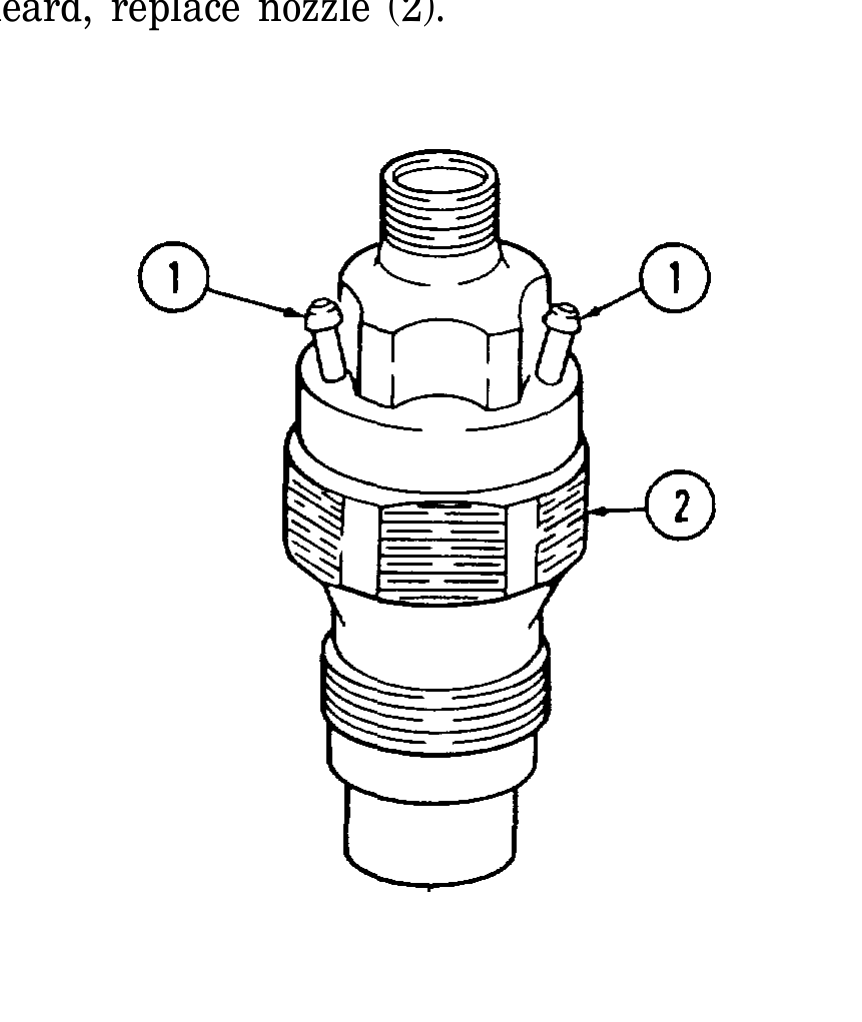
1. Inspect fuel injection nozzle (2) for thread damage. Replace if damaged.
2. Inspect fuel injection nozzle return nipples (1) for damage. Replace fuel injection nozzle (2)
     if damaged.
3. Inspect fuel injection nozzle (2) for cracks and evidence of heat damage. Replace if cracked
     or damaged.
     c. Testing

1. Preparation.
    (a) Connect fuel injection nozzle (2) to tester.
    (b) Connect lines to return line nipples (1).

                      Do not place hands or arms near nozzle during testing.
                      Penetrating force of oil may cause serious injury or death.
    (c) Close shutoff valve to pressure gauge on tester.
    (d) Operate tester to prime nozzle (2).
2. Obtaining pressure check.
    (a) Open shutoff valve to pressure gauge 1/4 turn.
    (b) Depress lever on tester slowly. Note at what pressure the needle on pressure gauge stops.
          Opening pressure must be between 1,500 psi (10,343 kPa) and 1,960 psi (13,514 kPa). Replace
         nozzle (2) if opening pressure does not meet specifications.
TM page 2-143
3. Leakage test. (a) Open shutoff valve to pressure gauge one additional turn.
WARNING Compressed air used for cleaning purposes will not exceed 30 psi (207 kPa). Use only with effective chip guarding and personal protective equipment (goggles/shield, gloves, etc.).
(b) Blow-dry end of nozzle (2).
NOTE A pressure of 1,400 psi (9,653 kPa) must be maintained for 10 seconds while checking for nozzle leakage.
(c) Depress lever on tester until pressure gauge reads 1,400 psi (9,653 kPa) and observe tip of nozzle (2). If a droplet forms and drops off the nozzle (2) in 10 seconds or less, replace nozzle (2).
4. Chatter test. (a) Close shutoff valve to pressure gauge. (b) Depress lever on tester slowly, noting whether a chattering noise can be heard.
NOTE Faster lever movement may cause nozzle to hiss or squeal rather than chatter; this is acceptable.
(c) If no chatter is heard, increase speed of lever movement on tester until nozzle (2) chatters. If no chatter is heard, replace nozzle (2).
TM page 2-144